Tatehana means literally “standing flowers” and is the predecessor to rikka. The arrangement consists of just two parts: the main “branch” called motogi, and all the rest of the materials called shitakusa, meaning the material below or underneath the motogi.
Although there are no “rules” as such for arranging tatehana, certain features occur. The motogi is tall, usually, but not always, straight and rises up “as if in prayer”as Jeanne Holy, our January sensei, described it to us. Beneath it are the other materials. It is important to see each branch from the front, and it helps to think of creating the arrangement using your knowledge of rikka. Since rikka came after tatehana, it naturally retained some of tatehana’s characteristics.
For example, we should see a center line. The mizugiwa is defined clearly. There is also material which is used just above the mizugiwa to tighten the focus, to “ground” the arrangement as it were. (Think of our free style workshops in which we stressed the grounding of the arrangements, providing focus to the base. Or think of the do/maeoki of rikka.)
When placing the other materials, remember the importance of space. Each branch you place creates a space between itself and motogi, for example, or between itself and another material. Vary spaces, wide and narrow. Remember too to use long and short branches. Strive for overall balance achieved by using not only floral material but also space.
Wiring is often necessary to achieve the proper positioning of branches in tatehana. Remember to use the thinnest wire possible, not only for aesthetic reasons, but also to inflict less damage to the plant material. In my tatehana example I used only #22 and #24 wire. Place a wire along the stem on either side of the point at which you wish to bend the stem, loop it around the stem and then wind the wire back down the stem along the first section you placed. (Practice helps!)
Many of you have tatehana vases, but if not, use something similar. The komiwara (straws) from previous workshops can be reused, but do rinse them and allow them to dry between uses. If you do not have komiwara, use a kenzan elevated to the proper height, about 1” below the vase rim.
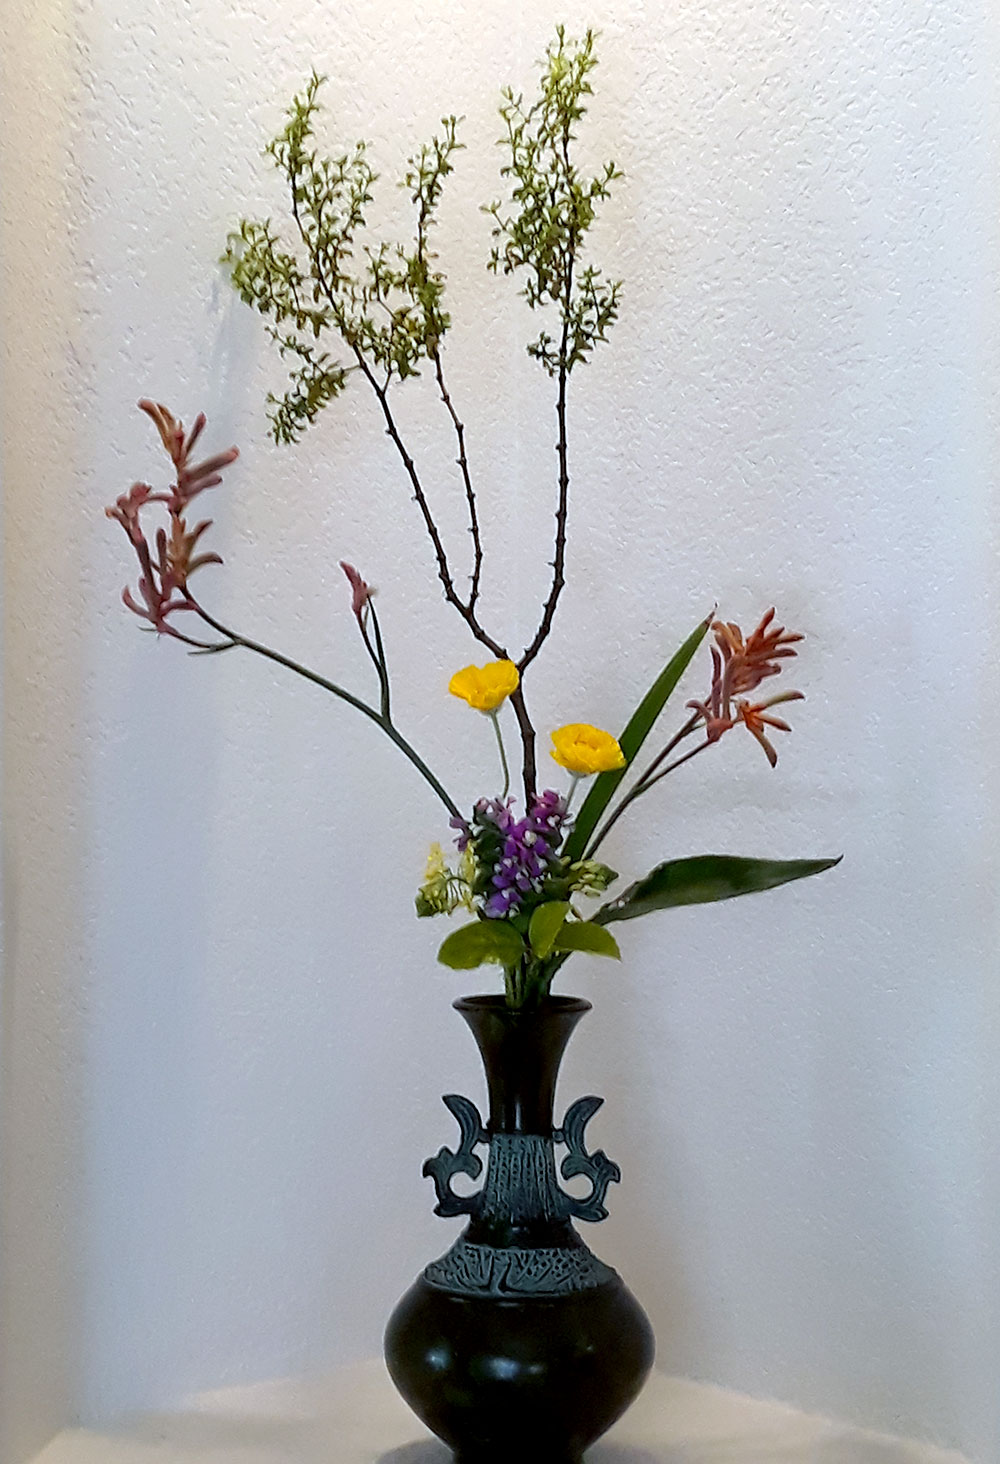
EXAMPLE ARRANGEMENT
In my arrangement I have used creosote as motogi. The larger (taller) materials below to both left and right are kangaroo paw. There are bright yellow desert marigolds in the center. Below sweet pea shrub and delicate bulbinella serve as a kind of “do” while hibiscus leaves define the mizugiwa and bring a grounding or focus to the arrangement. A white bird of paradise leaf extends to the lower right providing balance with the taller kangaroo paw on the left. A large leaf is a common element in tatehana (and rikka).
NOTES: Be creative in finding materials. If you do not have creosote, perhaps there is a shrub in your yard or on the patio, or along the path of your morning walk, and use whatever small flowers you may have. If you would like to have me review your work, send a photo. I am happy to “consult” on this arrangement. You will receive workshop credit for this, and it’s free! Please write or call if you have questions, and enjoy arranging tatehana.
Linnéa